Sunday, 23 October 2011

Natural Make-up and Bright Lip.

Hay guys so I wanted to show you a few pictures of a photo shoot that I did in August with the fantastic Michelle Shread Photography, and 3 of the most gorgeous girls I have ever seen.

This was a Saturday filled with much fun, pouting and girly giggles, which mainly came from me lol.

What I wanted to achieve on the day was 2 looks. One a completely clean, natural, no make-up look and the other a bright lip look. Now these lovely ladies have all got youth on their side, they are only 15 years old, but with youth also come responsibility for my self and the photographer. What we didn't want to do was make these ladies look older than their years, so both the make-up and photography were carefully selected with this in mind.

You will see that the 3 ladies pictured below are all completely different skin tones, hair and eye colours, which was amazing. It is the first time I have worked on a group shoot with so much diversity. I was constantly in awe of features, skin tone and texture all day. Every time a different girl sat down I was full to the brim with complements for them all over again. It was amazing, I loved it!


Products used

Primer: Smashbox Photo finish light
Eye base: Too Faced shadow insurance
Foundation: Graftobian HD
Powder: Elf HD
Eyes: Rimmel Colour Mousse 8hr 008 Sassy, MAC Phloof, Maybelline Great Lash blackest black mascara.
Cheeks: MAC Phloof (highlight), NYX blusher Peach, NYX light brown (contour) *sorry some of my contour and blushers come from a NYX pallet which didn't name them.
Lips: Carmex Classic lip balm, Sleek Tinted Lip Colour Electro Peach.


And for the bright lip I just added OCC Lip Tar Beta. 


Products used

Primer: Smashbox Photo finish light
Eye base: Too Faced shadow insurance
Foundation: Graftobian HD
Powder: Elf HD
Eyes: Rimmel Colour Mousse 8hr 006 Get Fresh, MAC Phloof, Maybelline Great Lash blackest black mascara.
Cheeks: MAC Phloof (highlight), NYX Sliky Rose, NYX medium brown (contour).
Lips: Carmex Classic lip balm, Sleek Tinted Lip Colour Bare Minimum.


And for the bright lip I just added OCC Lip Tar Anime.


Products used

Primer: Smashbox Photo finish light
Eye base: Too Faced shadow insurance
Foundation: Graftobian HD
Powder: Elf HD
Eyes: Rimmel Colour Mousse 8hr 005 Glitz, MAC Phloof, Maybelline Great Lash blackest black mascara.
Cheeks: MAC Phloof (highlight), NYX blusher medium red brown with a shimmer *from the pallet, NYX dark brown (contour).
Lips: Carmex Classic lip balm, Sleek Tinted Lip Colour Bare Minimum.


And for the bright lip I just added Sleek Pout Paint 163 Peek-a-boo.

This is the first time I have used the Sleek Pout Paint and you can see that it is not quite as opaque as the OCC Lip Tars. Also Michelle the photographer did say that this colour needed quite a lot of boosting to make it bright enough in the picture. Now as it is the first time of using this product it could have just been the difference in natural lip colour that had an effect on the shade and transparency. I did try OCC Lip Tar in Traffic first which is a bright yellow and that left the lips looking very patchy. Also the Sleek Pout Paint looked whole and bright in real life so I may give it another try before it is relegated to the depths of my kit bag.

For the last picture I thought we would ramp up the fun a little, as if it wasn't fun enough, and we went all out with some glitter lips. Everybody loves a bit of glitter, don't they? 


On the orange lips I used NYX Glitter Mania in Hot Gold. On the pink lips I used Glitter Dust (no make) in Purple. And on the blue I used The Body Shop Sparkle Rollerball which is a white glitter with iridescent sparkles.

So guys I hope you have enjoyed this post. I'm working on some Christmas looks at the moment so stay posted for those.

Stacey x x

Thursday, 13 October 2011

Nicky Clarke Frizz Control 2000w Turbo Hair Dryer with Ionic Technology


A couple of weeks ago, on the day that I'd had my hair done, my hair dryer decided that this would be the optimum time for it to break! Instead of blowing out the lovely warm air that I had grown accustomed to, there was only air as cold as Siberia to be had. Now maybe if I had many hours to spend with the Siberian air fixed on my head I’m sure eventually my hair would have dried, but as appealing as that sounds I decided it was time to spend my hard earned cash on a new one.

I would normally buy my hair electricals from a hair and beauty trade shop such as Sally’s or Alan Howard but my hair dresser suggested trying Boots this time as they always have offers on and the high street hair dryers are apparently quite good.

Before I set off I decided that I needed a spec to follow so I didn’t get carried away. My last hair dryer had different heat and speed settings and a cool shot button so these were definitely on my list. Also I really wanted a colourful one, something bright and funky. Most of all price had to be factored in and really I only wanted to spend about £25, a task in it’s self I feel.

I had researched on the Boots website and there were lots of coloured ones on there for around my price range but unfortunately when I got to the shop there was only one coloured one that matched the spec. It was amazing! It had multi coloured stripes and it was a really cool shape and it was £50. Twice as much as I really wanted to spend. So then I had the dilemma of choosing a normal, dare I say Boring hair dryer that met the spec for £25 or shell out the mammoth amount for a hair dryer that effectively does that same but looks really cool. Now in the past my crazy side would have taken over and the expensive hair dryer (along with most of the Sanctuary range) would have been in my bag, but my sensible side prevailed, YAY ME :0) And I went for the well put together, sturdy, spec meeting hair dryer that is the Nicky Clarke Frizz Control 2000w Turbo hair dryer with Ionic technology.

*the funky one would have probably broke anyway, well that’s what I tell my self lol*


The details on the box states that this “frizz control turbo hair dryer utilizes the latest in Ionic technology which helps to leave hair silky smooth and frizz free”

As my hair is in fact the complete opposite of frizzy this description was not really the reason I bought this product. I was swayed by that fact that it has 3 heat settings, 2 speed settings, a cool shot button and a turbo boost.

All in all this is a pretty good hair dryer. Its light, it’s fast and it does exactly what it says on the tin and for £25 I would definitely buy this again. Although maybe Nicky Clarke, the same hair dryer with some extra colour please, thank you?

Stacey x x

Monday, 10 October 2011

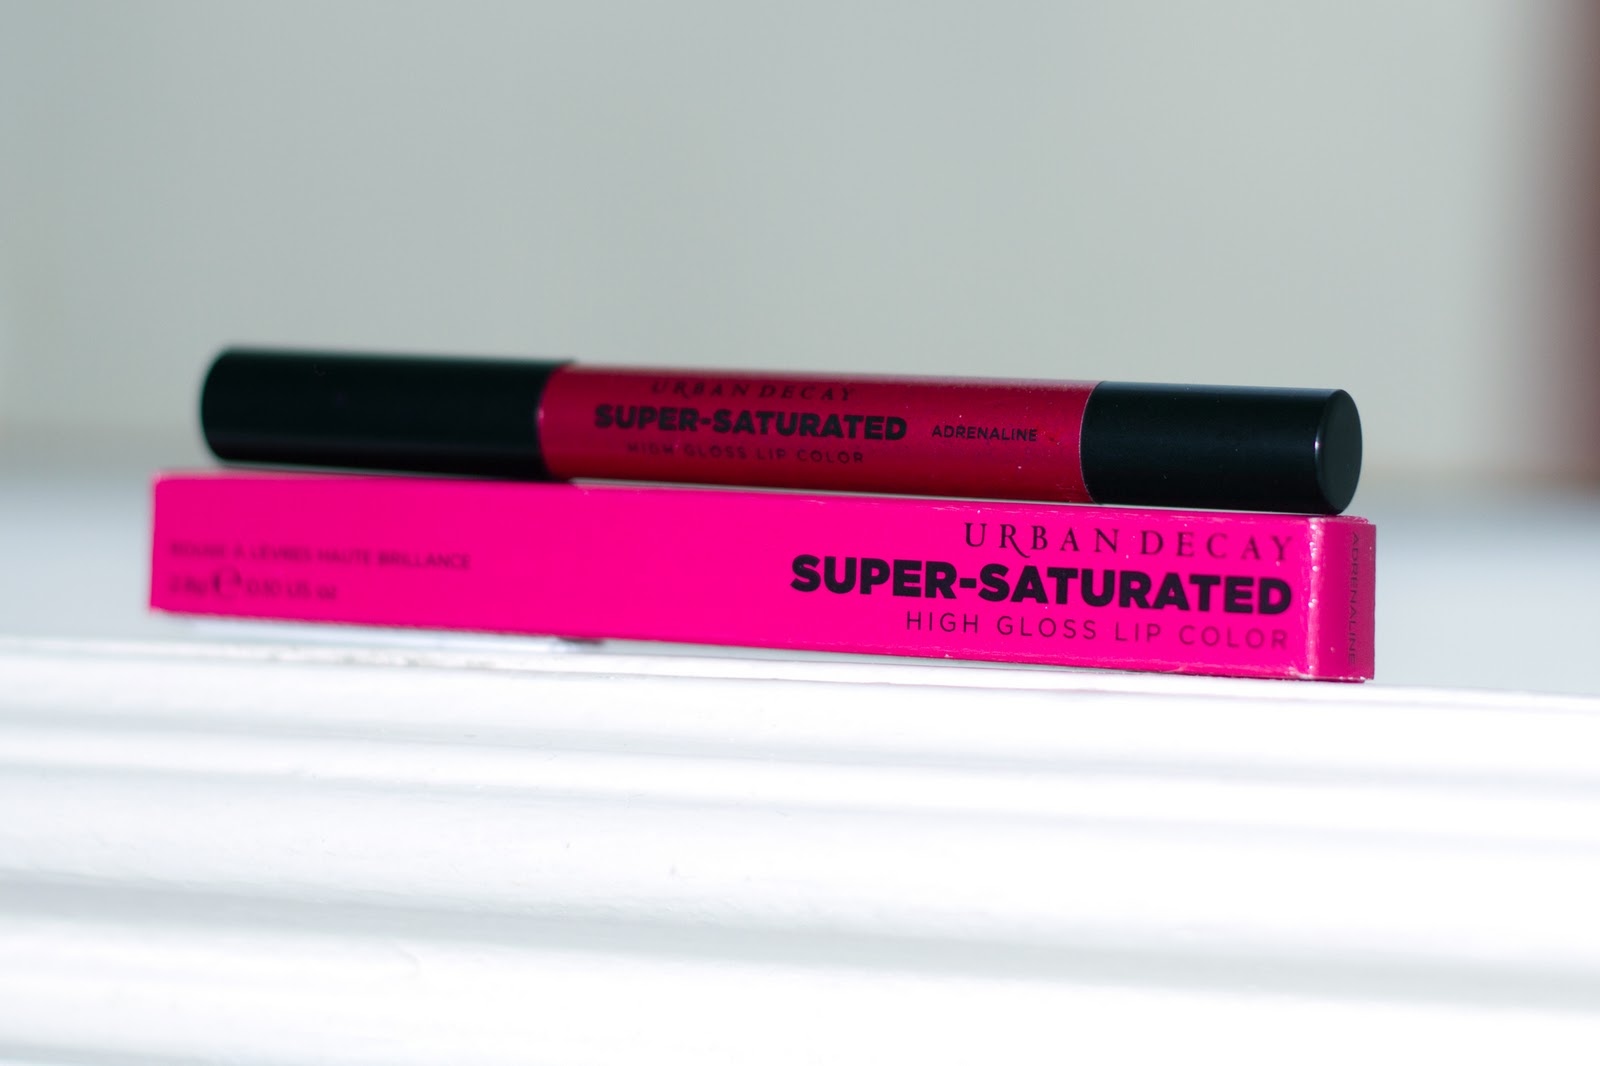
Urban Decay Super Saturated High Gloss Lip Colour

Just a quick review for you today guys. I was reading a well know fashion magazine the other day, Look magazine and I saw a write up on this Urban Decay lip gloss.

It stated “This contains phytosterol, a plant oil that not only moisturises, but helps prevent collagen loss as our lips age”.

Now I don't believe everything I read in the glossys but with technology advancing at break-neck speed I didn't think this statement was too far from what could be reality, also I did see Xsparkage (youtube make-up artist) use it in one of her videos and it looked really nice so I thought I'd give it a go.

We have to bear in mind I'm never going to know if this one lip gloss in the known universe has single handedly prevented collagen loss from my lips, namely because I use loads of plumping, priming, moisturising products on my lips and also I'm only going to see the results when I'm about 50, in about 25 years.............ok in 23 years time! And I'm not sure you guys want to wait that long for a review so why don't we disregard this aspect and talk about the things we can see in the here and now.

So here it is, in all its glory. There are 5 colours to choose from in this range: F-Bomb (true red), Punch Drunk (orange red) and Crush (pink) which are all matte, and Adrenaline (red with gold glitter) and Big Bang (magenta with silver glitter). I decided to play it safe for my first one with Adrenaline, it was a toss up between that and Big Bang but I was a little worried that magenta might clash with my red hair. 


So Adrenaline it was, £14 from Debenhams and I have to say I am in LOVE with this product! I'm a lipstick girl anyway but I hate the faffing around that comes with lipstick. Normally with lipstick I would line the outside of my lips with a waxy anti-feathering lip pencil, then I would line and colour my lips in with a lip pencil that matched the colour of my lipstick, then I would put my lipstick on with a lip brush, then blot and lip brush again, and if there was time to leave the house after all that lol, I would take with me, the chosen lipstick, lip brush and a mirror for touch ups. Wow that sounds a lot, it really doesn't take that long but note the faffing involved. 


Well with this lip product you could even leave your mirror at home if you were cleaver enough (I am not so the mirror is with me at all times). I literally just took the lid off and crayoned the colour on to my lips, no out line, no lip pencil, actually I don't even think I blotted. I love the fact that I can take this product anywhere and reapply anywhere, with my trusty mirror of course. It felt lovely on my lips, it wasn't sticky or heavy, just lightly moisturising so my lips didn't dry out. This is the first time I have tried a lip crayon and I understand that Urban Decays offering may be a little expensive for some, but for me I am very impressed, so impressed in fact that I will also be purchasing Big Bang. Glitter lips are my favourite for the festive period so these 2 colours will see me right through. What I would like to see from Urban Decay though is a few more colours added to the collection, maybe some lighter colours as well because I think this product would be excellent for brides that want to wear lipstick on their big day but don't want the hassle.

Well I hope you have enjoyed the review today guys. Any questions or recommendations let me know.

Stacey x x

Friday, 23 September 2011

The Big Nails Inc Swatch

As a new season is upon us and companies are busy promoting their new wares (all of which I want of course), I wanted to get this post out to show you guys what already takes pride of place in my kit.

With that in mind I have started with my Nails Inc polishes, due to the fact that they have some amazing products coming out this season and I have a feeling I may be purchasing a few. 


(I apologise in advance if some of these polishes have been discontinued or if you are unable to get hold of Nails Inc where you live)


 From left: Jermyn Street, St James's, Birdcage Walk, The Mall, Clerkenwell, Victoria, Thames, Draycott Terrace.


 From Left: Clerkenwell, Jermyn Street, Draycott Terrace, The Mall, Victoria, Victoria, Thames, St James's, Birdcage walk, Clerkenwell.


Sorry guys the ones above were the first polishes to be photographed and I didnt think to put them in the order that I had painted them, however I noticed and rectified my mistake below. 


  From Left: Seven Dials, Tudor Way, Beaumont Street, Pembroke Close, Strawberry Hill


 From Thumb: Seven Dials, Tudor Way, Beaumont Street, Pembroke Close, Strawberry Hill


The 2 pictures above and the 2 pictures below are both Creme nail polishes, which means they have no shimmer, glitter, special effects etc, they are just pure, unadulterated colour. 


 From Left: Ibiza Orange, Jermyn Street, Victoria Gate, Haymarket, Baker Street (yep I have Jermyn Street twice)


               From Little Finger: Ibiza Orange, Jermyn Street, Victoria Gate, Haymarket, Baker Street


     From Left: Kensington Square Caviar, Kabaret, Kensington Road Caviar, Electric Avenue, Monmouth Street


 From Little finger: Kensington Square Caviar, Kabaret, Kensington Road Caviar, Electric Avenue, Monmouth           Street


The 2 pictures above and the 2 pictures below both show a selection of shimmer, sparkle and glitter finishes. 


                  From Left: Park Lane, Chelsea Square, Earlham Street, Belgrave Square, Manchester


               From Thumb: Park Lane, Chelsea Square, Earlham Street, Belgrave Square, Manchester

Well this has been a mammoth of a post today. I hope you have all enjoyed having a peek in to my collection and I hope all of the nail enthusiast's out there have found some thing of interest.

Stacey xx

Tuesday, 20 September 2011

New Red Hair

Hello and welcome to another very dull and rain sodden day in Lancashire. It feels like it has rained constantly for all my life (although it's probably only been two weeks). So to brighten my miserable mood, and maybe partially due to the fact that my hair was looking decidedly like a mullet, I decided a hair cut and colour was in order.

Now I'm really picky about where I go to get my hair done, not because my hair is amazing, but because it's really not! Its fine, its limp, its lifeless and a whole host of other adjectives that I probably shouldn't mention here. Yep, I think you can guess em. So I booked in with the fantastic Steph Osgood at Dash Hair Design near Bolton. Steph has been styling my hair for about 9 months now and I have gone from mid length brown hair (with the black ends, I was home dying before this), to an inverted purple bob, and to the fiery shortness that I have now. Throughout this time Steph has been consistent in her greatness, offering many a pearl of hair wisdom, and her cutting isn't too bad either lol

This time all I had in mind was that I wanted to go a little more red. I have to admit, I'm not very good when it comes to fully formed hair idea's so Steph normally has her work cut out.

This is the before picture


and (a drum roll please) VoilĂ 


As you can see the red idea was kept and Steph added the darker and lighter flashes and the blunt fringe. The result? I absolutely love it! I think the colour makes my skin look amazing and the blunt cut brings it bang it up to date.


Now to round this up, what blog post wouldn't be complete without a little product loving so below you will find a list of products that I currently use to keep my hair looking it's best.


Wella Brilliance Shampoo

Bastiste – Nude Dry Shampoo

Charles Worthington – Rough and Tough Salt Spray

Tigi – Bedhead Small Talk

Tigi – Hard to get Wax.

Fudge – Paintbox in Red  Corvette

Thanks for reading and if you have any hair product recommendations for me let me know.

Stacey xx


Tuesday, 13 September 2011

Nails Inc Magnetic Nail Polish

HI Guys,

I am very excited with what I am about to show you today. Lets begin by setting the scene: yesterday I was working hard as usual when I got a nice surprise, an email from the lovely people at Nails Inc. Now it is no secret that I LOVE Nails Inc and at the moment you may or may not know that they have a Special Effects range out at the moment (I wore the Glastonbury glitter polish on my wedding day, it looked Awesome). Anywho the email enlightened me to the fact that they had just launched their Magnetic nail polishes. So I hot footed it down to my local Debenhams to snap one up to review for your fine selves, and maybe because I really wanted it.

And here it is in all its glory.  
I chose Trafalgar Square magnetic polish and this was £13.


Even though I love Nails Inc I was a little sceptical about whether the idea surrounding these polishes was a tad too big to pull off. I mean a magnetic polish that moves around the nail to make a pattern. Pah! How can this work when we are not yet riding around in space cars like George Jetson?

So using all my super human ingenuity and reading the instructions (peal back sticker on the lid) I got down to it……………..trying the product that is. 

1st Step: I painted my nails with a base coat. I used Soho Silk.

2nd Step: I then painted my nails with the first coat of Magnetic polish and waited about 5-10mins for drying time, as it was the first time of using this product and I didn’t want to be painting and repainting in to the wee hours.


3rd Step: I then applied a moderately generous amount of the Magnetic polish to one nail at a time and then held the magnet over the top of my nail so that the ridge was touching my skin near my cuticle. I held the magnet over for about 20secs and within that time THE MAGIC HAPPENED.

And then ……………………..Ta Da!


A silent W.O.W appeared on my lips when the effect was revealed. Now I have tried a lot of nail products in my time (and unfortunately my time is getting on now) and there has been more than a few that have claimed the world and delivered nothing. But I must admit this product has claimed and delivered. This product is fantastic; I can’t rave about this enough. It was easy to use, the effect was pretty much instant (a must for a therapist, limited manicure time and all that) and so funky. I really am amazed and I will be promoting this product to every one that will listen. And to Nails Inc you have brought it out of the bag yet again. I salute you!! (oh and bring out some more colours please :0)

 
A little word to the wise, I’m going to try a few things with my polish to see if it gives any different results.

v     Try holding the magnet over the nail for different amounts of time to see if this gives different effects
v     This time I moved the magnet in a seesaw movements from side to side to get the pattern over as much of my nail as possible. Next time I am just going to hold it in one place on the nail to see how it looks with a selected part patterned.
v     I am also going to turn the magnet on its side to see that that gives a different pattern as well.
v     Oh and keep an eye on how close the magnet is to your nail, I had a few smudging incidents when I misjudged this.

Above all have fun with this product and let me know how you get on.

Foot note: I can only apologise for the pictures in this post, they arent quite as bright as i would have liked. Unfortunately the light in my new house is not great and the sun had gone down by the time I got home from my hard days work. I will work on the lighting for the next post though.

Stacey x x

Monday, 15 August 2011

Body Shop shower gels

Good morning ladies and gents. First of all let me apologise as I have not up loaded any post for what seems like for ever. I do have an excuse for this though. I am now a MRS! Yes you guessed it. I have been busy getting married, oh and moving house. I am in fact crazy to have attempted both these things at the same time, but we survived and now I can return my attention to you guys.

So to ease us back in slowly this post will be short, sweet and relaxing (in a bath/ shower kind of way)


Before the wedding I took a trip to one of my usual haunts, The Body Shop. Now as I love anything that smells nice, especially in the bath, and as my self and The Body Shop are already well acquainted the first shower gel I chose was an old favourite. Spiced Vanilla.

For me this show gel has such a comforting fragrance. With its warming and spicy tones it makes it the perfect choice on a cold winter’s night, or in fact any night in the UK. I really like how the vanilla is quite subtle compared to some bath products I have tried. This means that it is not a sickly, over powering smell.

My next purchase was a shower gel that I had not had the pleasure of trying before. Jolly Orange was chosen for my love of orange scents. When I’m feeling down and I need something to bring the sparkle back I use an orange scented product in my bath.

As this was in the sale as well as the Spiced Vanilla I thought I would give it a try.

Although the scent of Jolly Orange is not a bad one it could have been a little better for me. Baring in mind that I am the self confessed guru of orange smells; to me it smelt a little man made and frankly not orange enough. Now remember this is just personal opinion and it will in no way stop me from using this all up.

As well as the 2 above I also bought 2 shower gels from the Earth Lovers Range.

The Earth Lovers range carries The Body Shop eco-conscious symbol which promises that products using this symbol are non toxic to the aquatic environment, use minimum and recycled packaging and meet strict biodegradable standards.

They are also parabens, sulphates, colourant and soap-free.

And may just I say, Oh how I love these!!!

I love the face that both these scents are fruits combined with herbs. To me this makes them smell Devine. The scent is natural, not man made and not perfumy at all.

The Apricot and Basil shower gel smells predominantly of apricot, which is amazing for me as it transforms any wet and wild day instantly in to summer. Where as the basil just tones down the fruitiness to stop it from becoming too over powering. Fruity fans will love this one.

The Fig and Rosemary on the other hand is on the complete opposite end of the spectrum. The first thing you notice about this scent is the rosemary, which I am aware is an acquired taste. For those of you who may not have experienced this scent before it is distinctly herby. For me this is what I love about it. To be honest I’m not completely sure what fig smells like bit it can definitely not be a bad smell that’s for sure.

So apart from the smells these shower gels perform exceptionally well. They lather up a treat, feel smooth and silky on the skin and when I pour them under running water they make bubbles to rival a bubble bath.

All in all I was very happy with these purchases and I will definitely be repurchasing from The Earth Lovers range in the future.

Stacey xx